What is Latte Art
– Its Fundamentals, History and Techniques –
Did you know?
People currently consume more than 2.25 billion cups of coffee daily all around the world. Without a doubt, coffee is one of the most popular beverages in our modern world.
Our own history of coffee is rich and colorful. Therefore, it created a vast and diverse ‘coffee universe’ with literally hundreds or even thousands of different coffee drinks we can choose from.
Additionally, the energizing dark liquid comes with a lot of great health benefits. Some coffee enthusiasts even say that coffee makes them happier and live longer.
Coffee shops are on every street corner these days. You can buy great coffee from professional baristas. Or, you just make it at home yourself.
But, making great tasting coffee simply is only the starting point.
In our today’s coffee world, coffee lovers and baristas like to elevate their skills and elements of making coffee even further.
This may include showcasing elaborate pour-over devices and techniques, combining hot espresso with cold milk. Which creates a beautifully dirty collision in a cup. And many more.
But, it all started by turning a simple looking latte into a truly eye-catching work of art.
Nowadays, the latte art and its world around it is a central part of our coffee world. This article will explore its fundamentals, its history and different types.
Let us get started.
So, What is Latte Art?
In short, latte art is a method of preparing coffee.

Essentially, you are pouring microfoam into a shot of espresso. As a result, you can achieve and master different patterns and designs on the surface of your coffee cup.
Most commonly, baristas use latte art to produce figures and shapes on the foam surface on popular espresso-based drinks such as lattes and cappuccinos.
Moreover, the latte art image itself comes from the contrast between the white microfoam. And the espresso’s rich red-brown crema. Typically, the microfoam itself is a form of textured, steamed milk. And, the cream is essentially an emulsion of brewed coffee and coffee oils.
Besides pouring your microfoam into a cup. You can also alternatively ‘draw’ latte art patterns on the surface.
In general, it takes some time and hours of practice until people can create attractive latte art patterns consistently. Therefore, a perfect pattern symmetry, high color contrasts and great consistency are the desired goal of any aspiring barista.
In order to achieve this and besides your own skill set. Overall, it is equally important to consistently create perfectly usable conditions of both the espresso shot and milk.
To pour or draw a latte art pattern eventually becomes the last part of the entire challenge.
The History of Latte Art
It’s quite difficult to say when and how latte art first emerged.
Most people closely relate the history of latte art to the history of the espresso.

The espresso was invented in Italy during the turn of the 20th century. And, since then, espresso and espresso-based drinks (internal link) made it all around the world.
Although, many people assume that latte art simultaneously emerged in different countries at the same time. Nonetheless, the general consensus is that it also shares its roots with the espresso in Italy.
The first significant step in the history of latte art assumingly took place in the American city of Seattle in the 1980s and 1990s.
In particular, latte art became increasingly popular thanks to David Schomer. He owned a local coffee shop and is the co-founder of Espresso Vivace.
During the late 1980s, David Schomer started experimenting with the development of microfoam or ‘milk texturing’ with different shapes. And, by 1989, he mastered the first heart shaped rosetta pattern.
Basically, he recreated the technique based on a photograph he saw from an Italian café called Caffe Mateki.
After, he further optimized his techniques and opened the popular course “Coffee latte art”. Quickly, latte art spread through all of Seattle. Then, it also captured the rest of the United States. And, eventually the rest of world.
Nowadays, latte art has become an indicator of an experienced and skilled barista. Worldwide, consumers are appreciating this beautifully artistic and more personalized experience of drinking a coffee.
Probably, the real beauty about latte art and its creative designs is the ‘mortal’ life time. It takes a lot of practice to perfect any of these eye-catching shapes. But just with a few coffee sips, this piece of art is gone. And, all that remains are memories of it.
The Technique of Latte Art
As we already found out, latte art requires two main ingredients.

And, these would be the espresso with its cream and microfoam. Then, you are simply combining these in order to make latte art.
But before you are adding your foamed milk texture. The espresso shot should preferably have a creamy brown surface. Generally, people better know this so-called emulsion as crema, of course.
Next, once you are pouring in your milk. The foam separates from the coffee liquid and naturally rises to the top.
And, if the milk and espresso shot are just ‘about right’. Plus, you are moving the pitcher during the pour correctly. The foam will rise up to the top and create a pattern at the same time.
That’s basically it.
Eventually, the final visual outcome will depend on how you are moving the pitcher. But, we will be getting to some of the core fundamentals of latte art in this article a bit later.
Overall, there seems to be some controversy in our coffee world when it comes to latte art. Some people say that there is too much focus on the practice of latte art these days. Your drink may superficially look great. But, some baristas may be ignoring other essential parts of good coffee. Such as taste, for example.
Especially many new baristas seem to focus too much on the art form. As a result, they may overlook other key parts.
Overall, it’s difficult to have a general opinion about it. This may be true for some baristas and their coffee making. And, for others it may be not.
I would say it all depends on our own coffee experience. And, our personal judgement whenever we are ordering a coffee with latte art from any shop around the world.
Different Styles of Latte Art
In general, we are talking about two main types of latte art.
First, there is free pouring. This means that you creating the pattern during the pour.
Second, there is the method of etching. Here, you are using a tool to create pattern after the pour. Overall, free pouring seems to be far more common in most cafés around the world. Even though, this style may take a bit more time to prepare.
Let’s have a closer look at both styles.
Free Pouring
Many coffee makers say that the free pour art is the more technical one of the two.
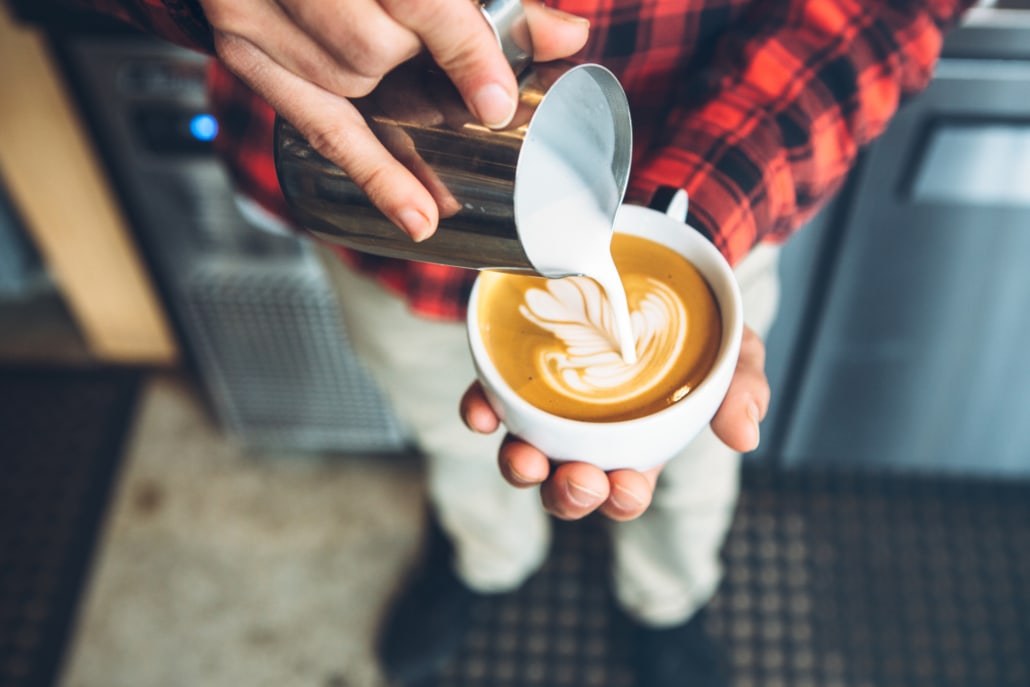
Basically, it involves you pouring milk straight from a jug into a cup of espresso. Furthermore, while you are pouring the milk, a combination of wrist and hand movements is used. This helps to bend and shape the way the milk is flowing into the coffee.
As a result, various creative patterns start forming. The most common forms of poured latte are a heart shape. Or, you can often see the ‘rosetta’ or ‘tulip’ pattern.
Commonly, hearts are a bit simpler and easier. Mostly, you can find them on top of macchiatos. While shapes of rosettas are more complex. Often times, baristas create them on lattes.
In general, free pour latte art requires hand dexterity, practice and patience. Practice is really the key word here. Because, it literally takes hundreds of attempts to perfectly master a pattern.
Normally, for free pouring, you either keep the cup at level. Or, you are tilting it in one direction.
Since you are pouring the milk straight into the cup, the foam begins to surface on side of the cup first. This is due to the tilt, of course. Then, you are moving the milk pitcher from side to side. And, you are leveling the cup at the same time. Or, you can also simply wiggle the spout forth and back.
Finally, you are finishing your masterpiece off by making a quick strike through the previously poured pattern. The so-called ‘strike’ creates the stem of the flower design. And, it eventually bends the poured zig-zag form into a clear flower shape.
Alternatively, more direct and less wiggling brings out a heart shape for example. With any slight variation, you can further vary your final design.
Etching
Now, free pouring may require more technical skills. Whereas, etching may require more ‘true artistic’ skills instead.
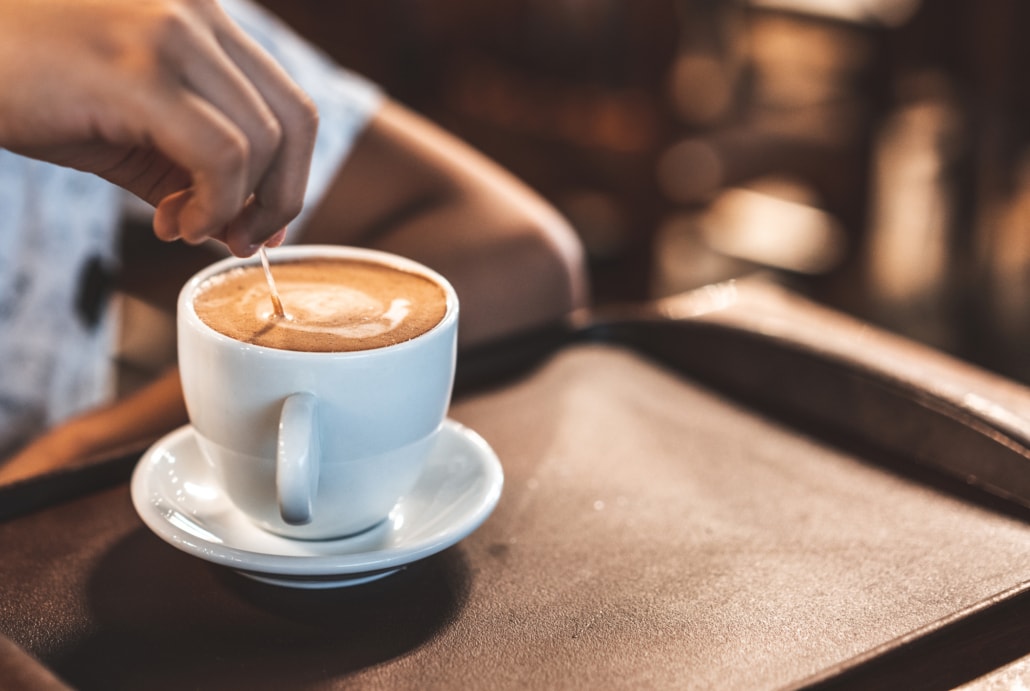
You are literally drawing with a special thin rod on your coffee. Some people simply use common toothpicks for this technique.
Skilled baristas can ‘etch’ or create almost any image or shape they want. This may vary from faces, animals, portraits to even anime characters.
In general, etched latte art has a shorter lifespan.
If you are comparing it to free pouring, the etched milk foam dissolves into the coffee much quicker.
Lastly, some coffee makers and especially larger coffee shops may simply use any sort of metal cutouts or templates to create patterns. For example, you pour chocolate powder through a metal cutout. And, this cutout maybe resembles the shape of a heart already.
Many big coffee shop chains like to make use of templates. Because speed is essence to them when serving large numbers of coffee to customers during peak times.
But, as you can probably imagine already. Not every coffee enthusiast still considers this to be ‘real’ or ‘true’ latte art then.
Instructions to Make Latte Art
Below, you can find a quick and very summarized overview of how to make latte art.
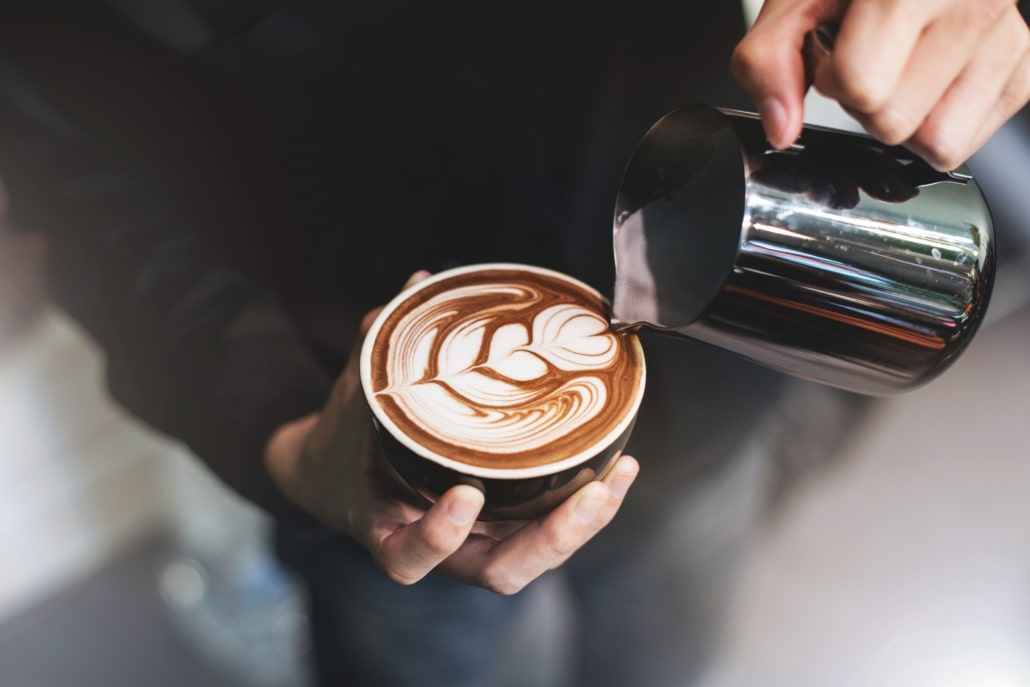
- Begin with the cup. Slightly tilt it away from you. This allows you better to create a latte pattern with minimal movement of your pitcher hand.
- Next, gradually pour steamed milk into the center of your cup. Try to hold the pitcher about an inch or a couple of centimeters above the cup. Steadily and slowly pour the milk right into the center of the crema.
- Drop your pitcher closer to your cup. And, speed up your pour. In other words, gently move the pitcher closer to the cup. Plus, tip it with your thumb. So, you can slightly speed up the pour.
- Wiggle. In order to do it right, toggle the pitcher gently and fluidly back and forth. This will create your wanted zig-zag pattern.
- Begin to un-tilt your cup. Slow down the pour again. And, raise the pitcher about half an inch or one centimeter. Now, you can finish the rosetta.
In more detail, back the pitcher toward the edge of the cup closest to you. This happens while you are untilting the cup the same time. Now, you are slightly slowing down your pour. And, you are raising the pitcher a bit above the flat cup. Lastly, drizzle or ‘strike’ a small milk stream across the entire center of the cup.
Congrats, you just finished your very own ‘rosetta’!
The 4 Fundamentals of Latte Art
What did we learn so far?
Let’s be honest. Making latte art may not be quite difficult to understand. But, it can be quite tricky and challenging to eventually achieve mastering the fluid dynamics of milk meeting espresso.
Overall, there are four main components of any latte art design and its creation.
The below list will share the most important aspects with you. It’s good to keep these in mind. Try to pay attention to them when you are pouring milk the next time.
-
Height
When making latte art, I always imagine someone jumping into a pool from a jumping board.

Ideally, you don’t want to make a big splash and cause a lot of waves. At least, when you are trying to be professional about it. Actually, we can use the same analogy for making latte art.
You don’t want your down pouring milk suddenly overpower your coffee with loads of milk foam.
Firstly, we should do the following instead. Namely, we need some of the liquid, steamed milk to create a ‘base layer’. Furthermore, this layer is under the espresso. This is happening before we are placing the milk foam on top. So, we can eventually create the latte art design.
Let’s get back to our diver jumping into a pool.
A professional jumper tries to make his or her body as narrow and compact as possible when making entry with the water. This is in order to create as few ripples and as little turbulence in the pool as possible.
In translation, the first milk entering the coffee should act like this.
Essentially, you want a thin and distinct stream of milk, first. Pour it slightly from above the surface of the coffee. Maybe about 5 centimeters or 2 inches high.
Okay, we have completed our ‘high-dive’ pour to initially fill the cup a bit with milk already. Now, we are ready to begin our surface design. For this, we are bringing our pitcher as close to the coffee as possible while pouring.
Overall, your final goal is to start high and slow. And then, bring it down low.
As a result, the closer you get to the surface with your pitcher, the more milk layers rest on top and don’t sink below anymore.
-
Position
As you can probably already imagine, the location or position where your milk is entering is quite important, too.

It makes a big impact on the symmetry and style of the final latte art design.
Please always try to remember. You are essentially pouring one liquid into another one. Hence, this means that your surface or ‘canvas’ is not sitting still while you are drawing on it.
Technically speaking, the force of the pouring milk liquid into the espresso liquid will push the design and the drink forward at the same time. In other words, you are mixing the drink while pouring and increasing its liquid volume.
For example, let’s say, you are pouring consistently in the direct center of the coffee itself. Now, you are getting a more centered design. Which will expand outward to all sides.
But, what happens if you pour off-center?
This time, the milk entering the coffee is creating a long snake-like trail. Moreover, it will funnily curl around the inside curve of our cup. Both positions will give us different design options.
Taking it One Step Further
Here is an advice for even more advanced positioning.
Firstly, you can pour your milk into the cup while it is sitting flat on top of a table or counter. Of course, this makes it much easier to aim for the center. But, it is not giving us as much depth of crema for the foam to settle. That’s quite important, when we are later trying to make our design.
So, here is what usually works much better.
Tip the cup slightly at the beginning of the pour. And then, gradually and steadily straighten your cup throughout the pour. In order to get it right, you need to gently reposition your milk stream during the process. As a result, it still stays centered all the time.
Plus, you will also get a better contrast between the white and brown liquid, now. Hence, your latte art design is coming out much clearer and distinct.
-
Flow
The amount of milk and its flow is another important factor to keep in mind.
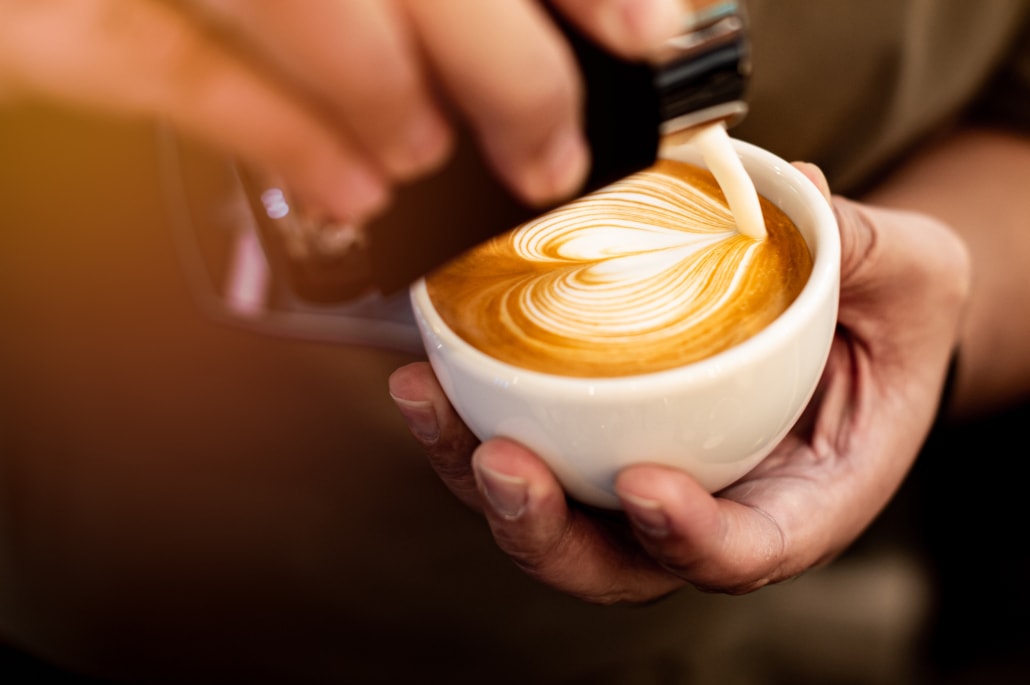
It is really quite significant how much or how little milk you are pouring out of the pitcher. Typically, there are two possible outcomes. You can either end up with a beautiful latte art design in your cup. Or, you will find an entire milk and coffee mess on the floor instead.
For example, if you are pouring too fast, you risk disrupting and even disintegrating the crema on the espresso. But, actually, we want to keep the crema intact and in place. Because it is acting as our surface or ‘canvas’ to draw our latte art.
Please remember, you want to start high and slow. And then, bring it down low. Finally, you are finishing it off by increasing the flow.
In fact, you can even put the pitcher until you are actually making contact with the cup. The closer you are getting, the more design will appear.
However, do not increase your flow before entirely bringing down the pitcher. In other words, you should increase the milk volume while you are coming down. Only start, once you reached your lowest and closest point in the cup.
As a result, the combination of the closer proximity and increased volume will bring out the white foam out of the bottom of the pitcher. And, it allows you to beautifully lay it on top of the espresso.
Just give it a try. It’s really helpful.
-
Control
Lastly, we are getting to probably the most crucial factor of all. Self-control, belief and patience.
Now, the first three fundamentals are very great already. Basically, they help you to make hearts, ‘monk’s heads’, or the white classic apple shapes already. You can find these popular patterns on top of many cappuccinos, for example.
But, maybe you want to take it one step further.
In order to eventually master ‘rosettas’ or ‘tulips’. You surely need to have proper control over your milk.
How to Make a ‘Rosetta’
First of all, even though a typical rosetta pattern may look amazing and challenging. It is actually not as complicated as it may initially seem.

Nonetheless, you need to understand all of the three above elements, first. Namely, height, position and flow. Next, the control comes in. Gently, you are moving your pitcher from side to side. This creates the petals of the flower design.
How do we get there?
Quite importantly, the movement is not an aggressive back-and-forth motion. Hence, you should not use your whole arm for it. Instead, it’s more like a gradual ‘pumping and releasing of the brakes’. You are squeezing and releasing your fist around the handle of the pitcher. In the same way when you are pumping the brakes on your bicycle.
Furthermore, you can better control the rocking by pushing off a bit with your thumb. Plus, you should hold your pitcher even and consistent while rocking.
This is creating the flower petals. That is, while you are close to the coffee in the cup. And, are pouring at a fairly ‘aggressive’ flow rate.
How many petals you want to draw depends on you. Once you have reached your desired number, it’s time finish the rosetta pattern.
Next, lift the pitcher 5 centimeters or 2 inches above the coffee again. Basically, it can be the same height again when you were beginning with your ‘diver’. Lastly, you are pulling a thin stream of milk through the flower petals. Ideally, start from the smallest to largest. Now, you just created an elegant ‘flower stem’.
How to Make a ‘Tulip’
Now, the remarkable tulip pattern works a bit differently.
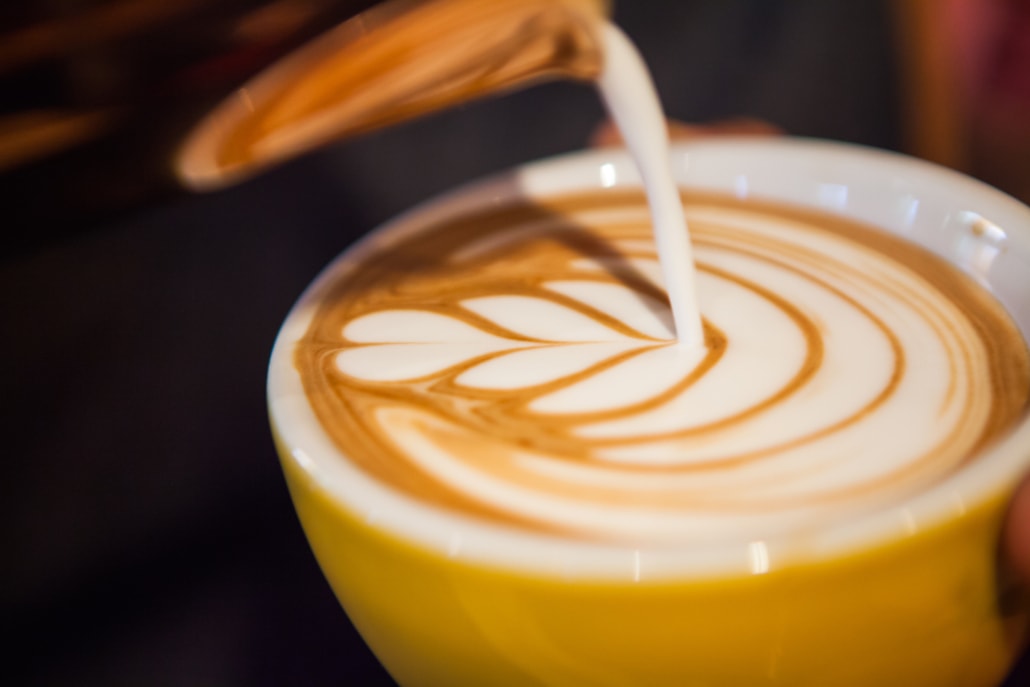
Again, it is mostly about control. Essentially, you need to know when to stop and start pouring milk in a slightly interrupted manner.
For this, you are not rocking your pitcher from side to side. Instead, you are simultaneously controlling height and flow, now.
Firstly, you are starting your pour high as usual. But, just before you are normally bringing the pitcher down to your cup. You are stopping the milk flow completely, now. And only then, you are lowering your pitcher.
Secondly, you can start pouring again. Right into the center. Try to be as close to the coffee as possible. And, pour an aggressively heavy, steady stream of milk then.
If everything goes as planned, you should see a white halo form inside the cup. This will become the first level of your tulip pattern. When you have reached enough size, interrupt the flow of milk of the pitcher again. Next, move the pitcher tip slightly backwards before starting to pour again. Close and fast again. This is creating the second layer we are looking for.
Thirdly, repeat the entire second process one more time. Now, we are making our third tier. After, reduce the flow again. Do this by lifting the pitcher up away from the coffee. Now, draw through the design. So, you can finish the petals of your tulip.
I will admit. A ‘tulip’ is probably a bit more challenging than a ‘rosetta’. But, I am sure. Over time, you will master both with ease.
The Bottom Line
Latte art is a truly exciting skill to learn and master. Or, even just looking and admiring it while enjoying a cup of coffee is a great experience already.
Sometimes, these latte art designs are maybe even to pretty to eventually ‘destroy’ and simply sip them away.
However, this is maybe also where the entire beauty and true fascination lies in latte art.
Each and every latte art pattern is unique on its own. It was individually created for one of us. And, it only lasts for a while. So, let’s just appreciate and enjoy as long as we can, I would say.
So, how about you?
What are your thoughts about latte art? Do you have any experience with making latte art already? Which pattern do you like to either make or enjoy the most?
In your opinion, what are maybe some of the most important aspects or fundamentals when it comes to making latte art?
Feel free to share your thoughts and experiences with us.
Until then, stay safe, healthy and properly caffeinated.
Cheers!
Related Posts

8 Fascinating Facts About The History of Coffee – ‘A Drink For The Devil’ –
Elephant coffee – The new luxury coffee – How great is it?
Is Latte Art Good or Bad? – Does Latte Art Make our Coffee Better or Worse? –

Filter Coffee and Espresso – What is the Difference? –

Coffee and Fair Trade – Is Fair Trade Coffee Good or Bad? –

How To Open A Coffee Shop – The Coffee Shop Equipment List You Need

Beer Coffee – Everybody’s Dream Come True –
Coffee Cupping – How to Professionally Taste Coffee –
